Install Gateway

How to install the AROYA Gateway.
Each facility needs at least one Gateway to connect all devices to the internet.
A Gateway could be already activated for your facility; if that is the case start with Step 2.
For new installs: First install the Gateway before activating other devices. It will speed up the installation process.
What's in the box
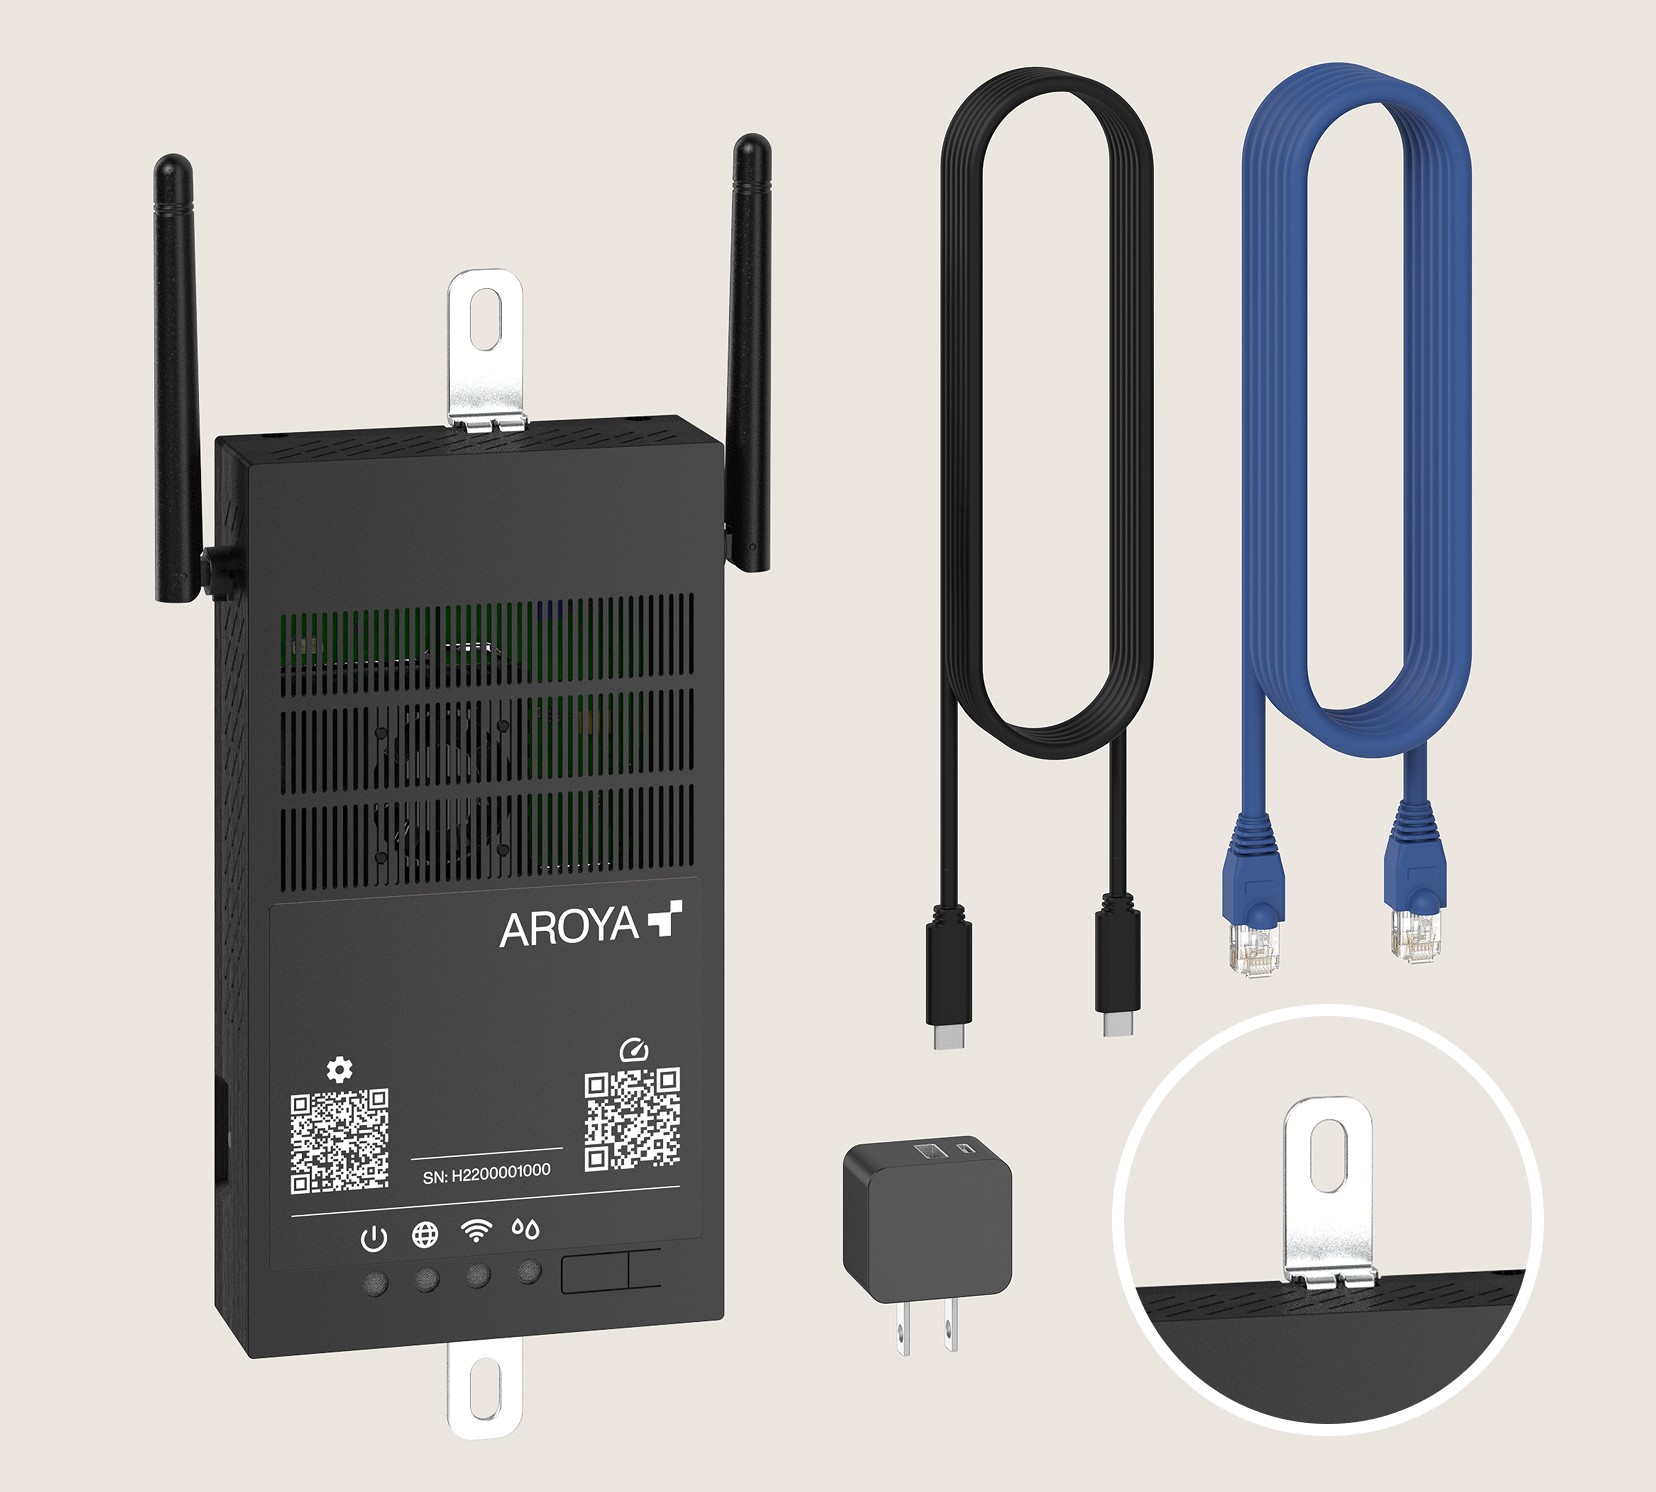
The Gateway package includes one AROYA Gateway device, a 6-ft Ethernet cable, and a and a USB-C power supply with cable. For installation, the box contains two mounting brackets designed to attach to the top and bottom of the unit for wall placement.
What else you need
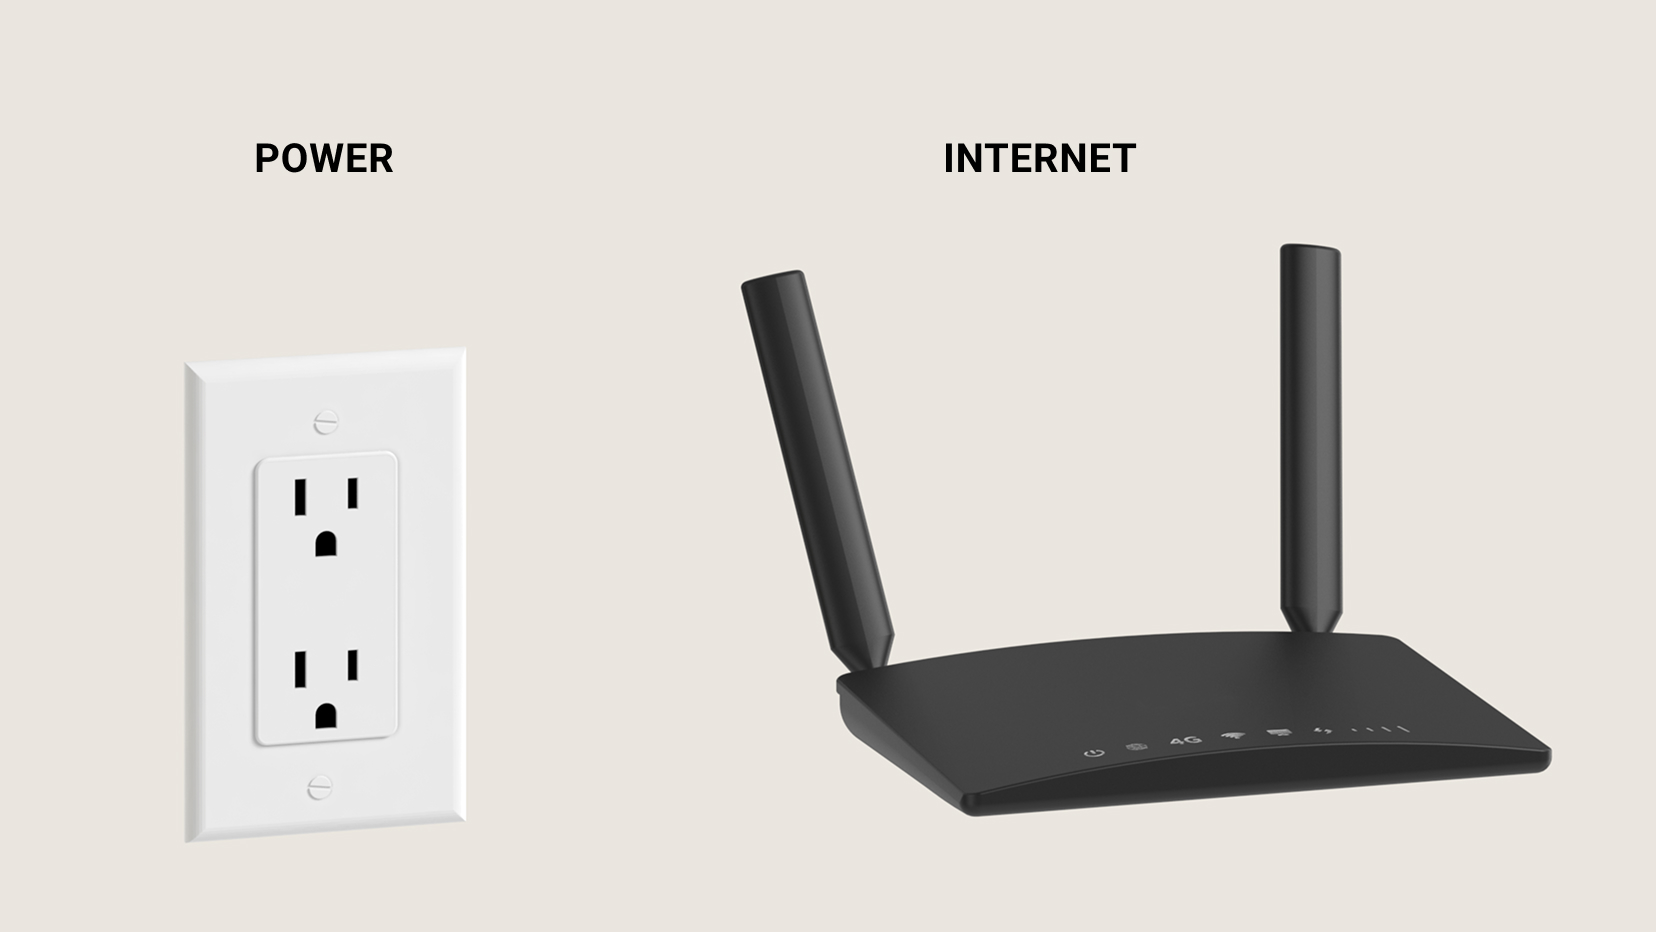
Access to an active internet connection and power. The Gateway requires a wired Ethernet connection to access the internet. Once plugged in, the device will automatically request an IP address from the network via DHCP.
For IT Administrators: To ensure a successful connection to the AROYA servers, the local network must allow outbound traffic for the Gateway on the following ports:
- TCP Ports: 80 (HTTP) and 443 (HTTPS)
- UDP Port: 123 (NTP)
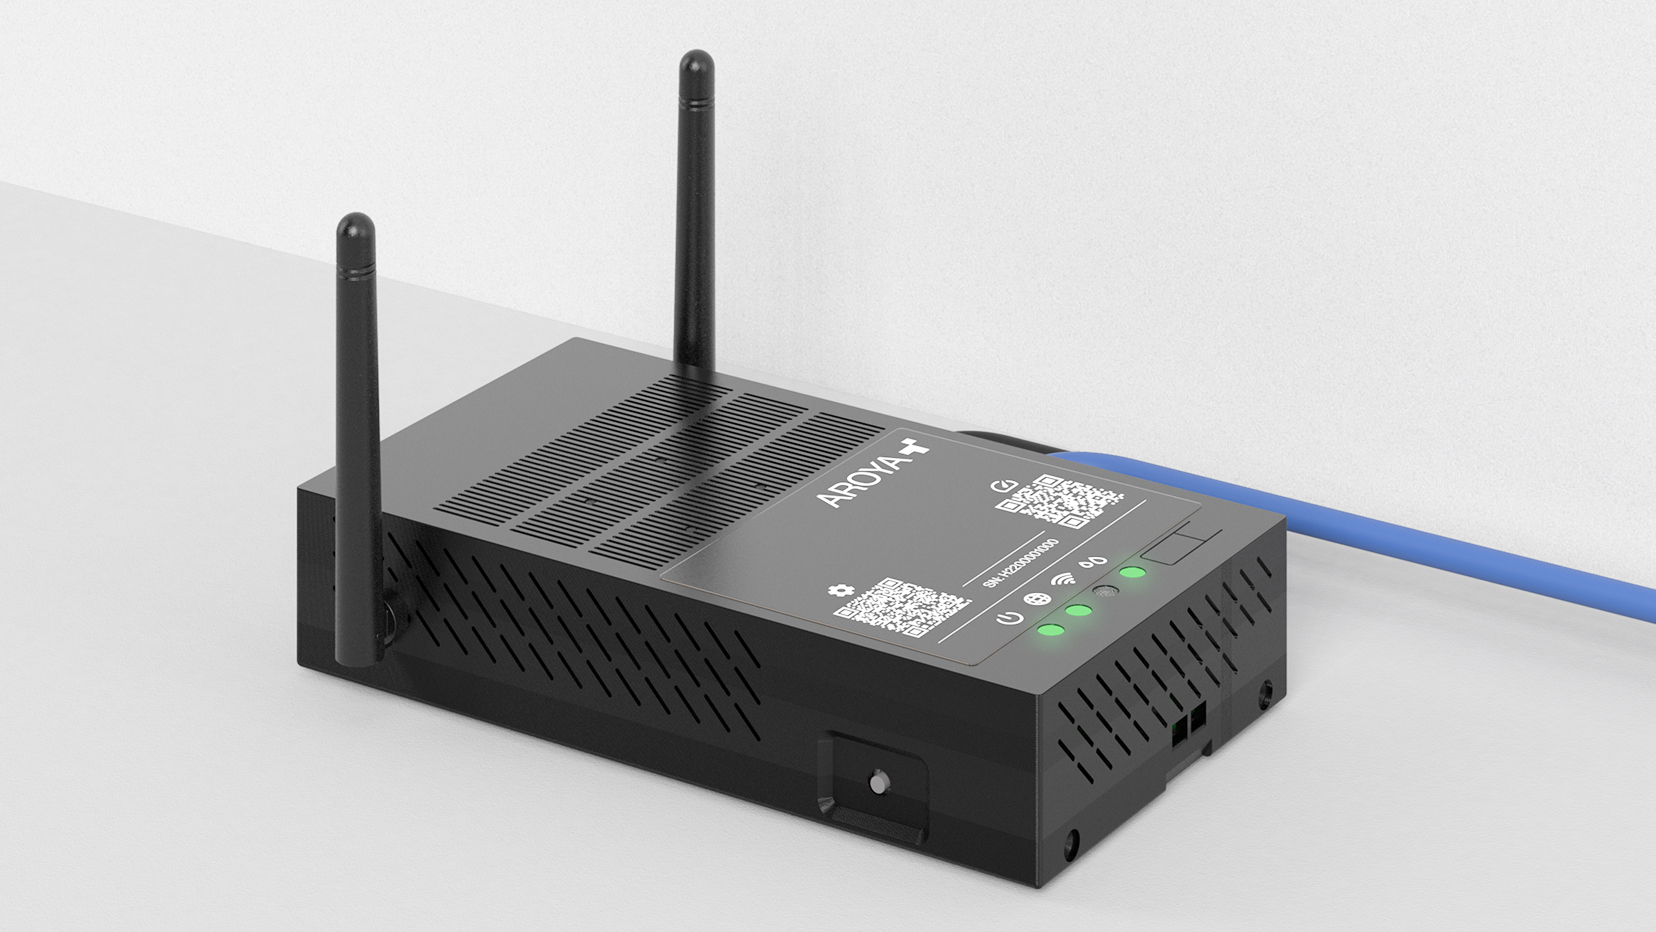
Step 1: Position the device

Place the device in a central location in the facility near the internet and power sources.
Important: Do not put a gateway in a grow room, where the humidity corrodes the devices. Unlike the other devices from AROYA that are sealed and designed for being close to plants, the Gateway will not tolerate typical indoor growing conditions.
Step 2: Power (First light)
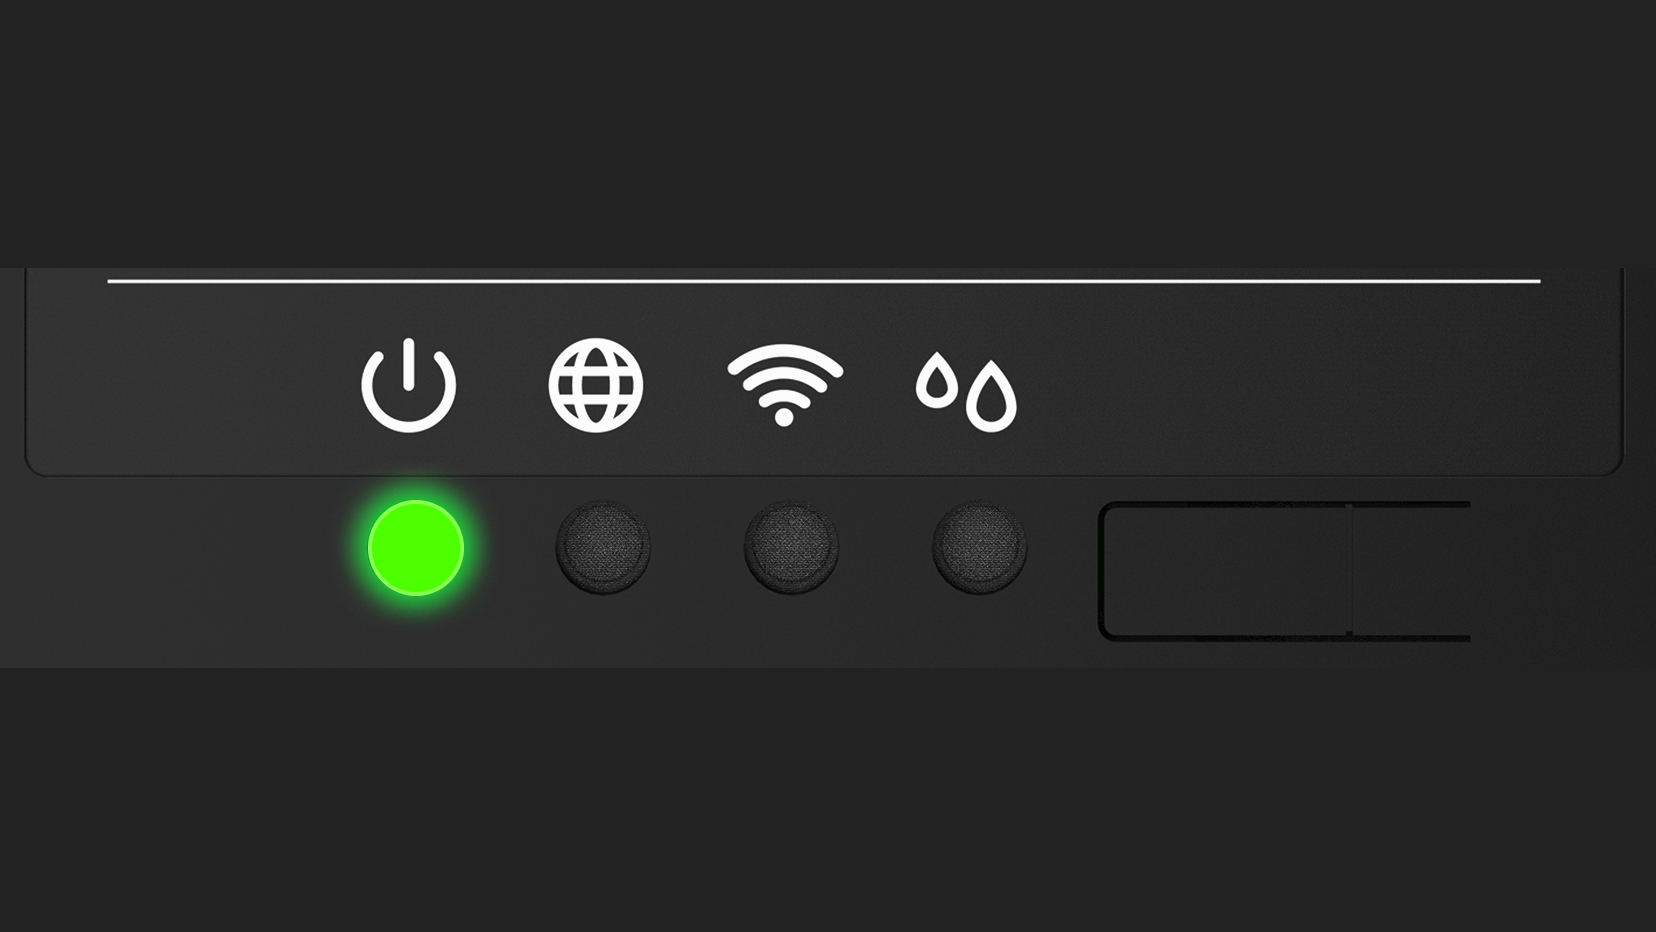
Power: The first LED should turn solid green as soon as the Gateway is plugged in.If it doesn't, double-check that the USB-C cable is pushed all the way into both the Gateway and the power adapter. Also, make sure the outlet actually has power.
Step 3: Internet (2nd light)
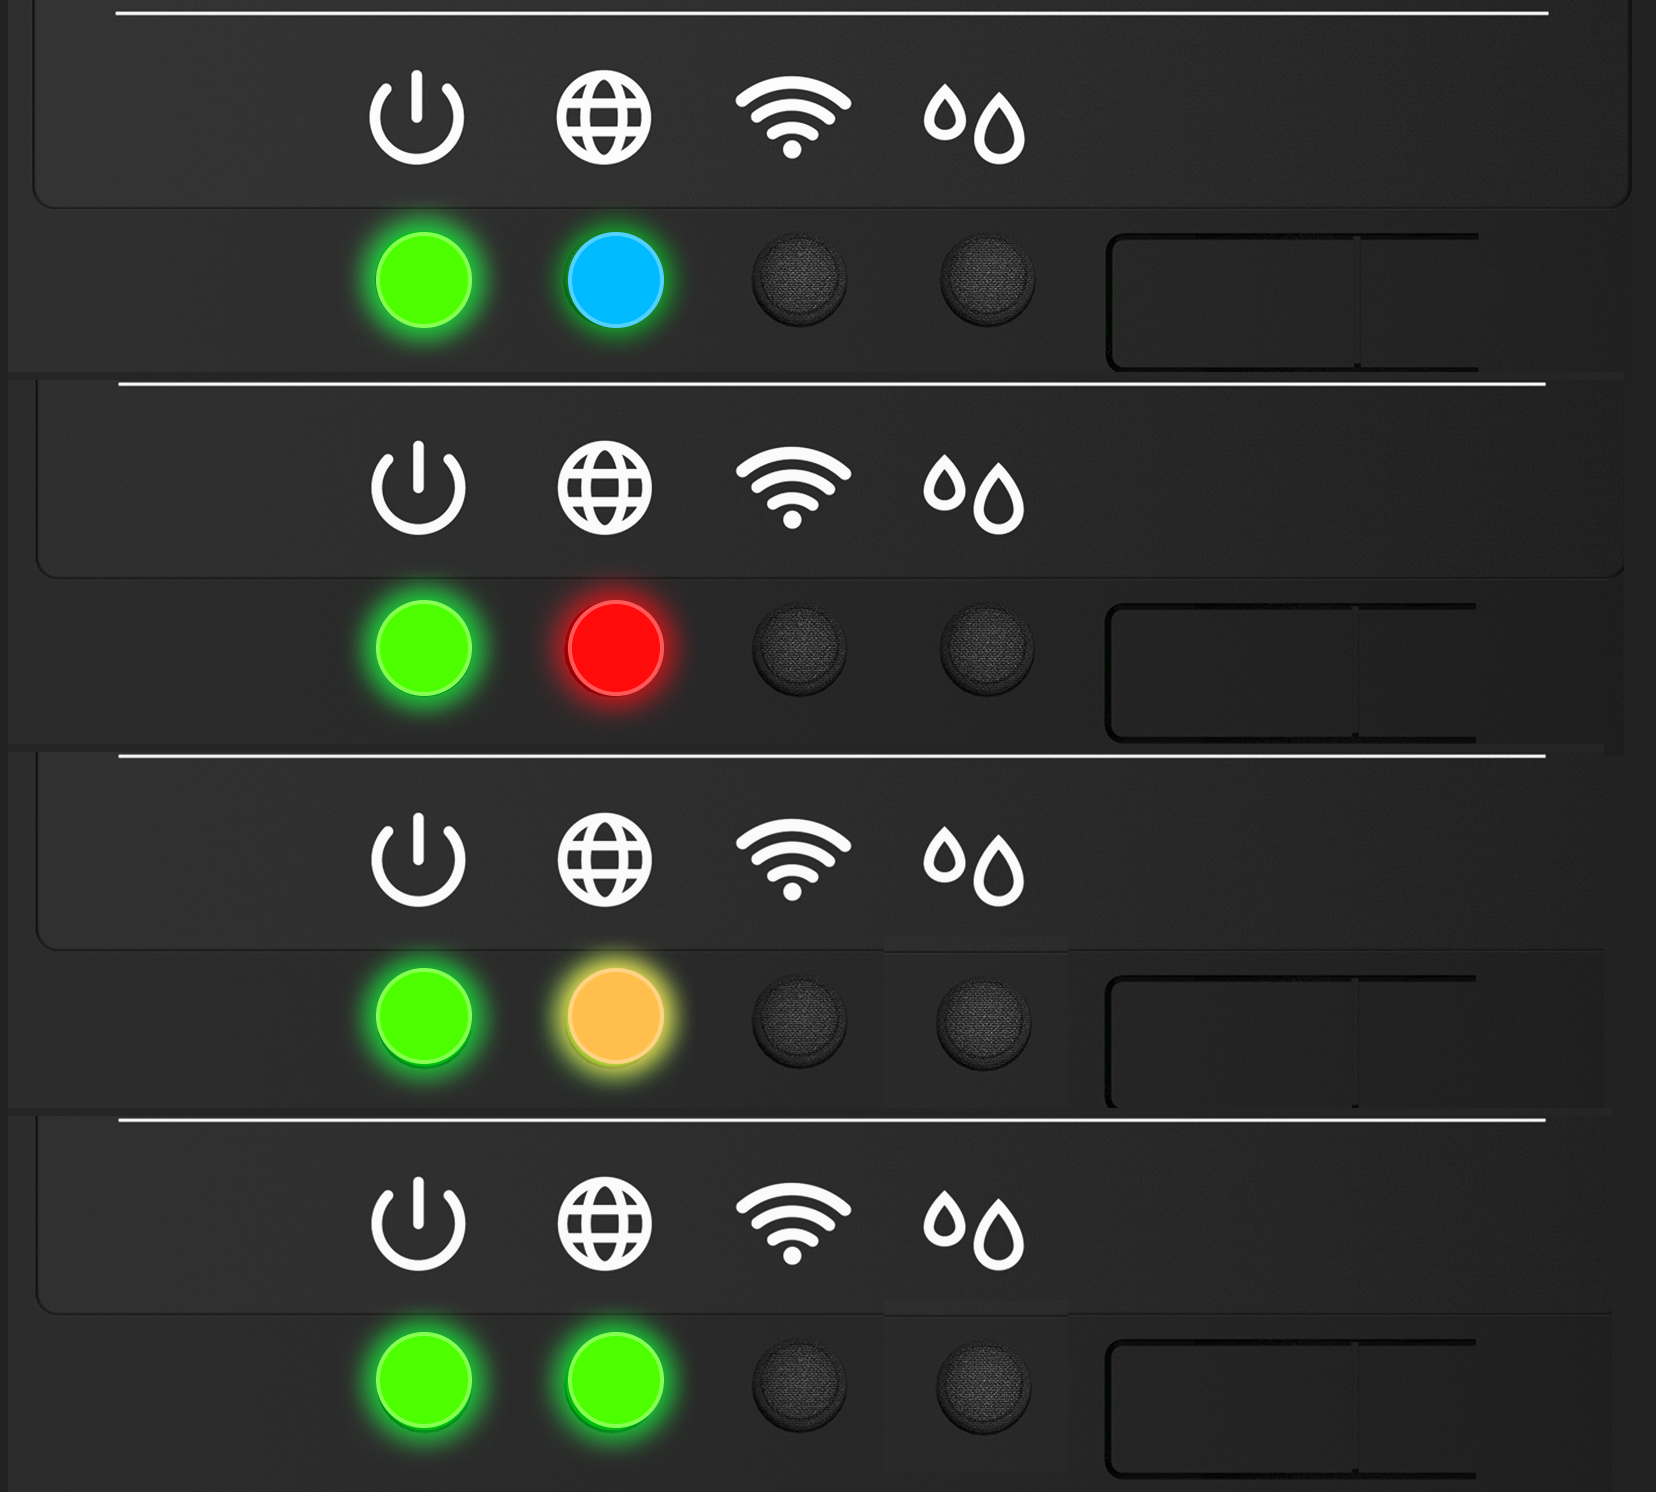
Internet Connection: The gateway should establish a full connection in under 1 minute.
- 🔵 Blue: Connection in progress.
- 🔴 Red: Cannot connect to local network.
- 🟡 Yellow blinking fast: Cannot connect to the Internet: Check with your IT department.
- 🟡 Yellow blinking slow or solid: Cannot connect to AROYA.
- 🟢 Green: Online and active.
If the Internet Connection LED does not turn green after a minute, then the Gateway is having trouble connecting.
A slow blinking yellow or solid yellow indicates an issue getting to AROYA specifically, so contact AROYA support to troubleshoot that..
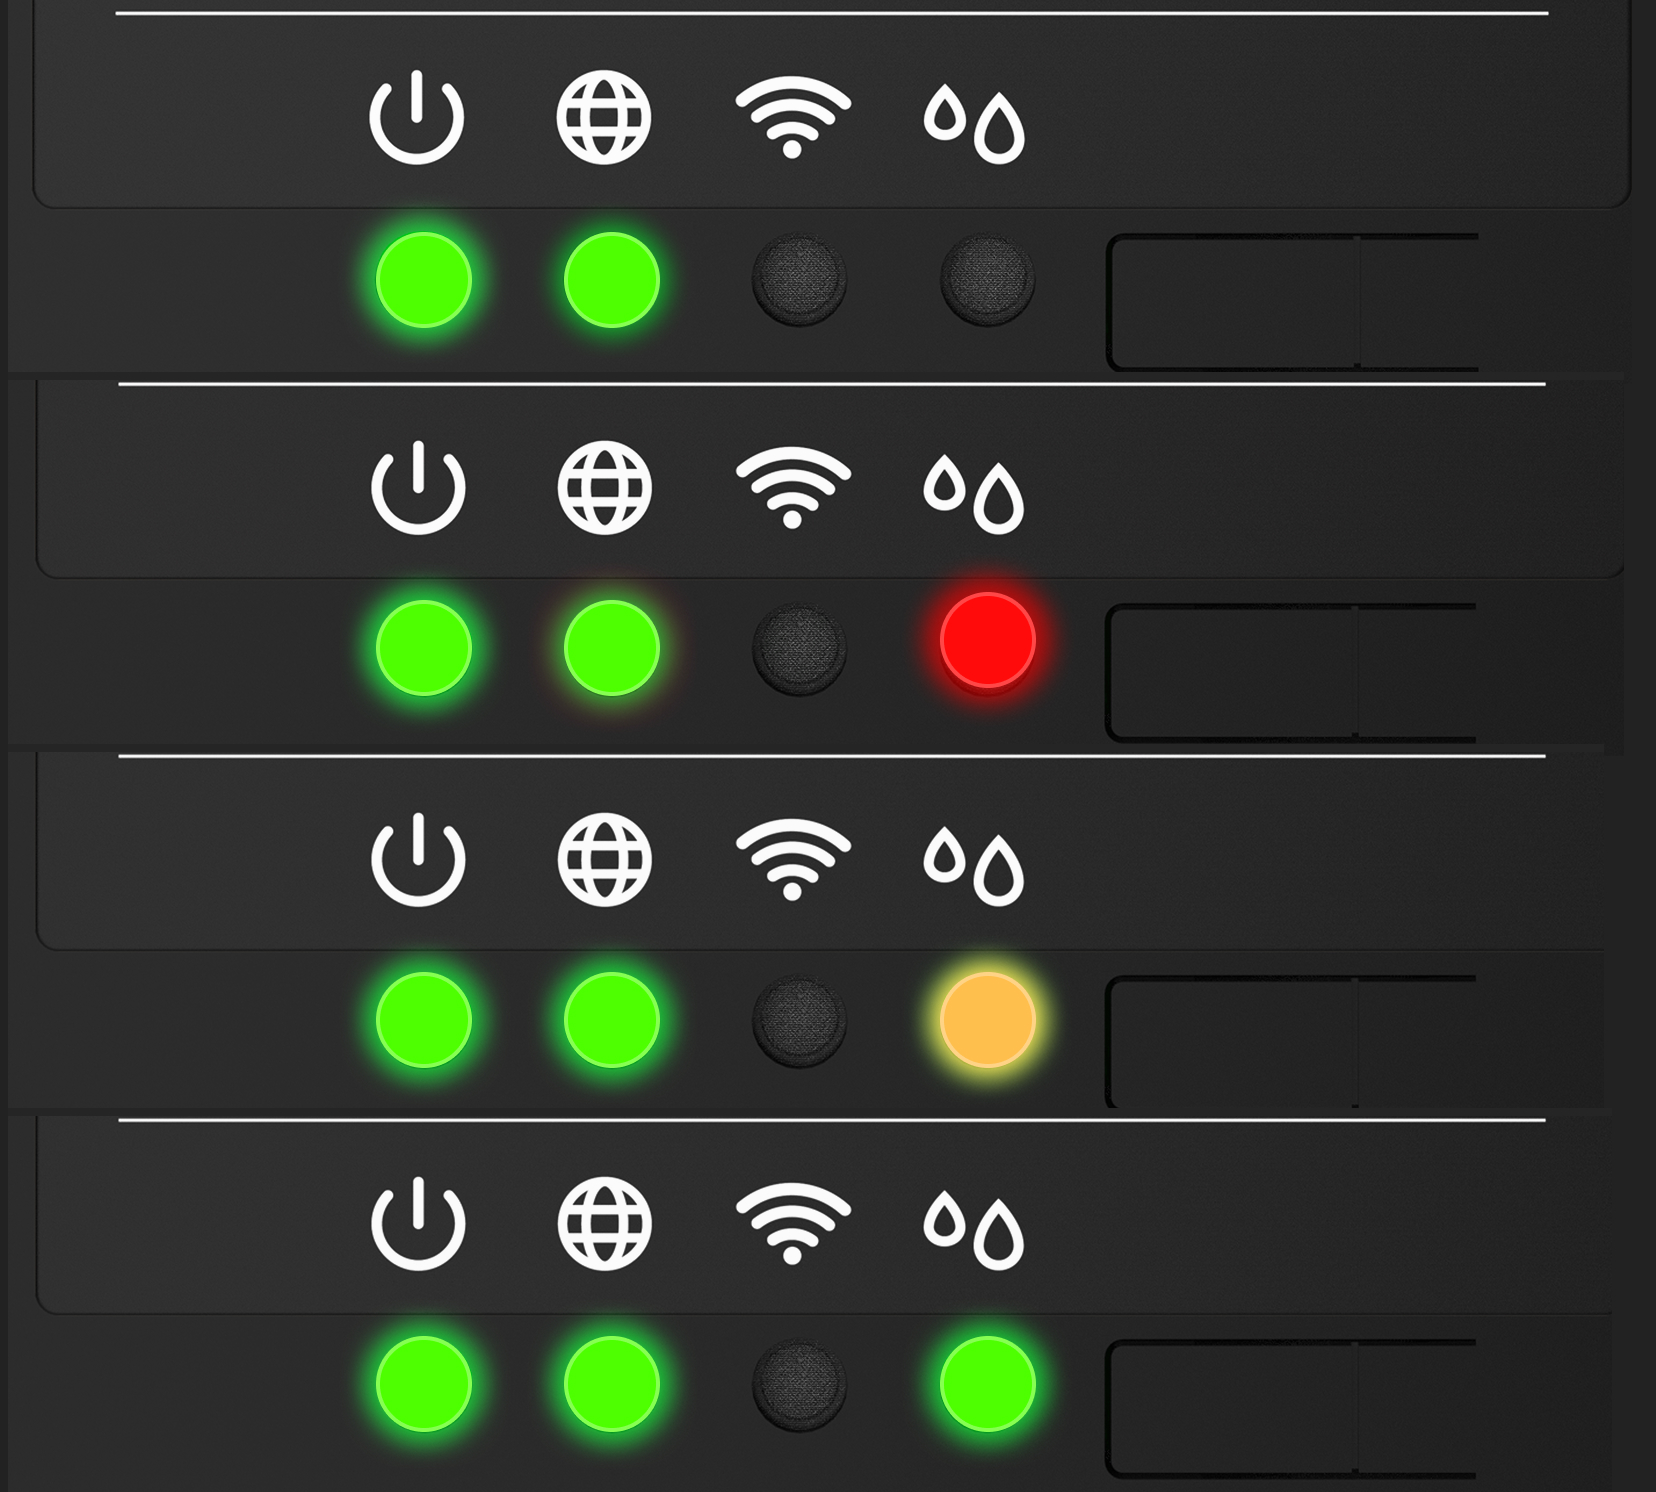
Step 4: Claim ownership
Activate the Gateway by navigating to the devices section in the AROYA mobile or web app and selecting ‘Activate Device’.
Mobile Activation for fast setup: Scan the QR code located on the front or back of the Gateway using a mobile device. This automatically captures the serial number and activation key.
Web Activation: If using the web application, manually enter the serial number and activation key found on the device label.Once activated, allow several minutes for the Gateway to complete the network handshake and establish a full connection.
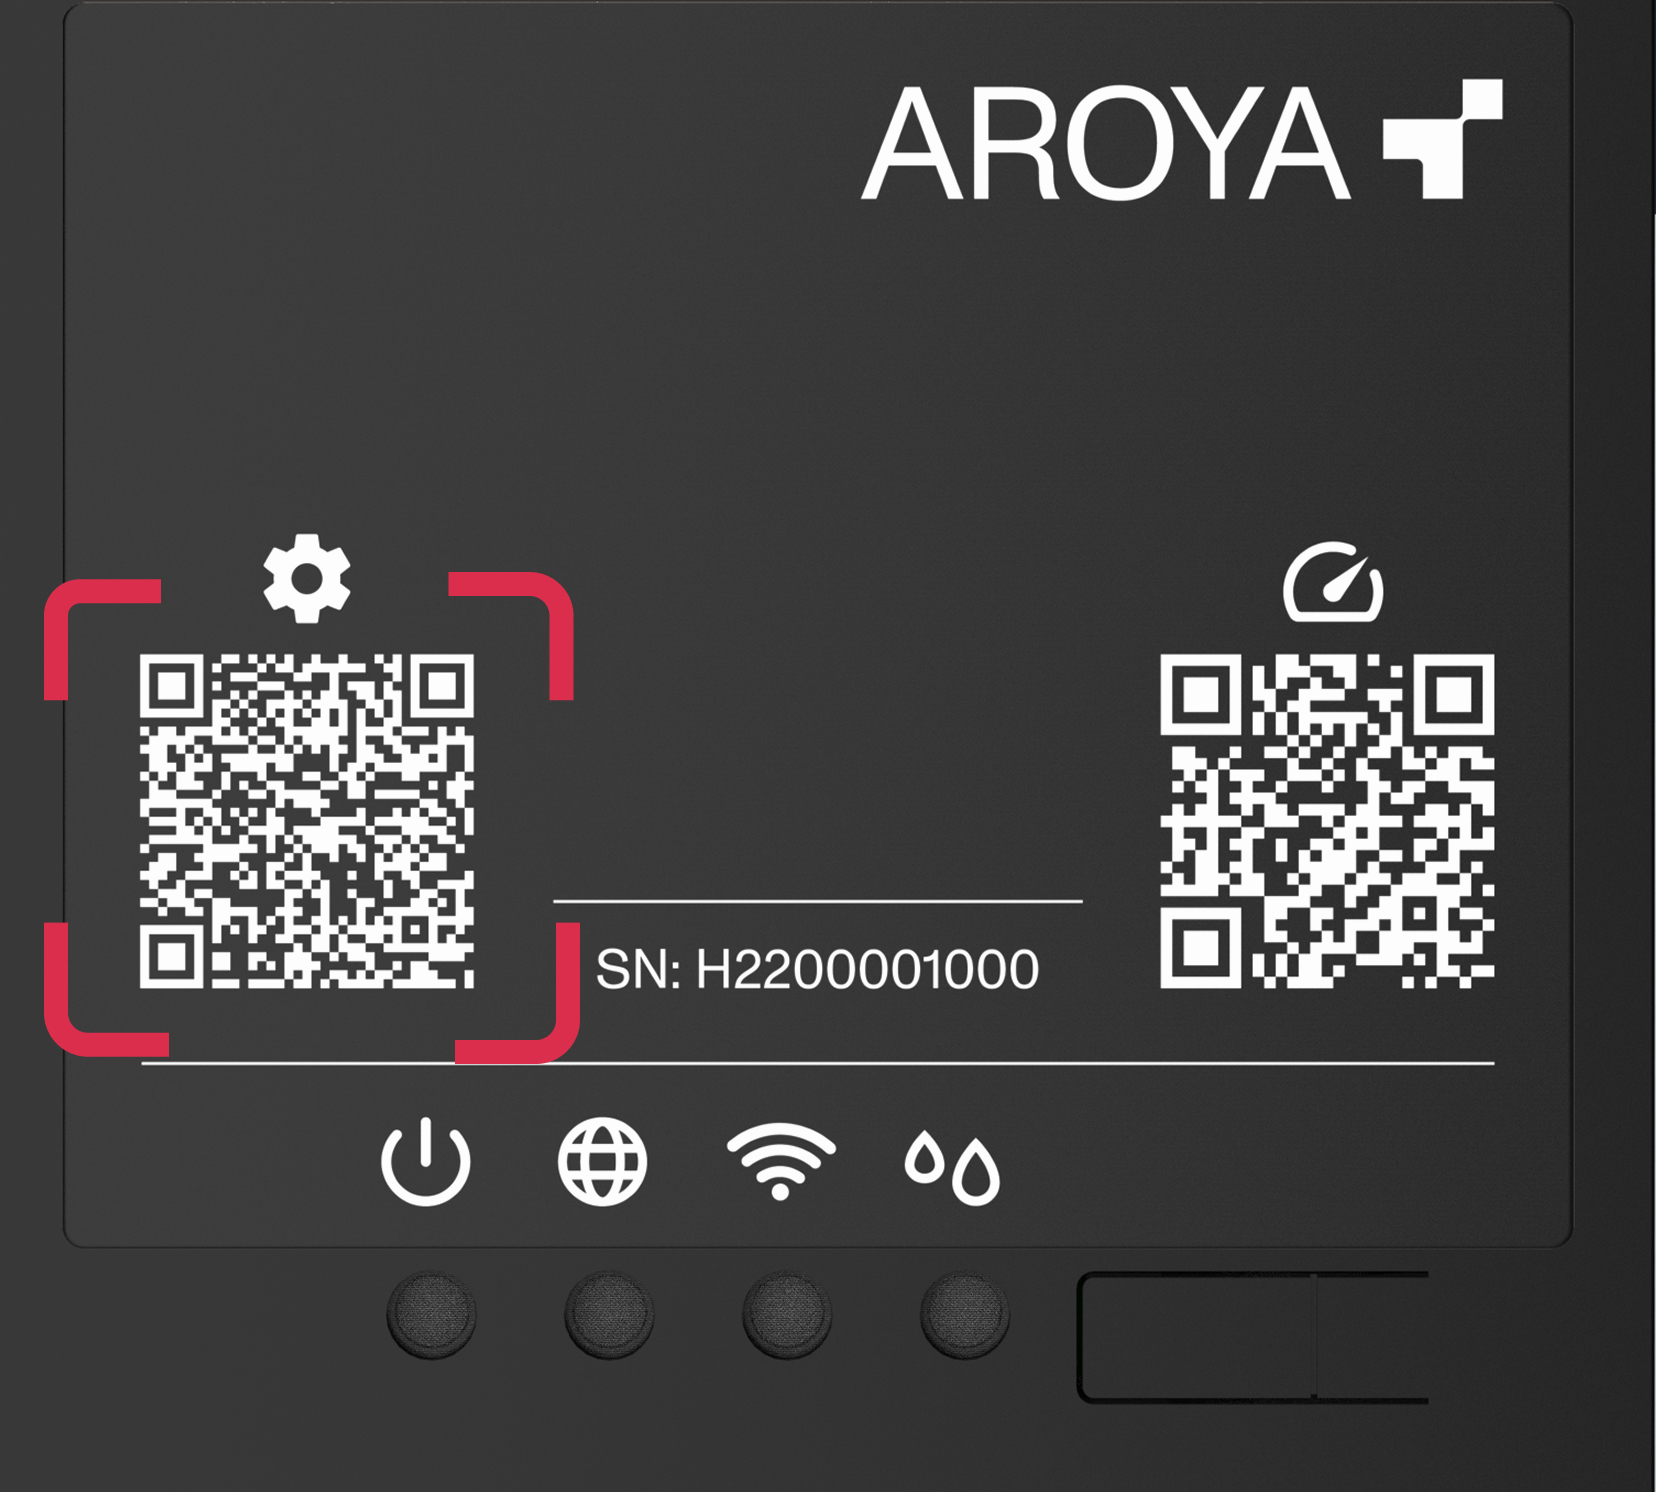
Step 5: Controllers (4th light)
Controllers: if you have any OpenSprinkler controllers configured, this LED will reflect their status:
- ⚫ Off: No Controllers configured
- 🔴 Red: All offline
- 🟡 Yellow: Some offline.
- 🟢 Green: All online
Device diagnostics
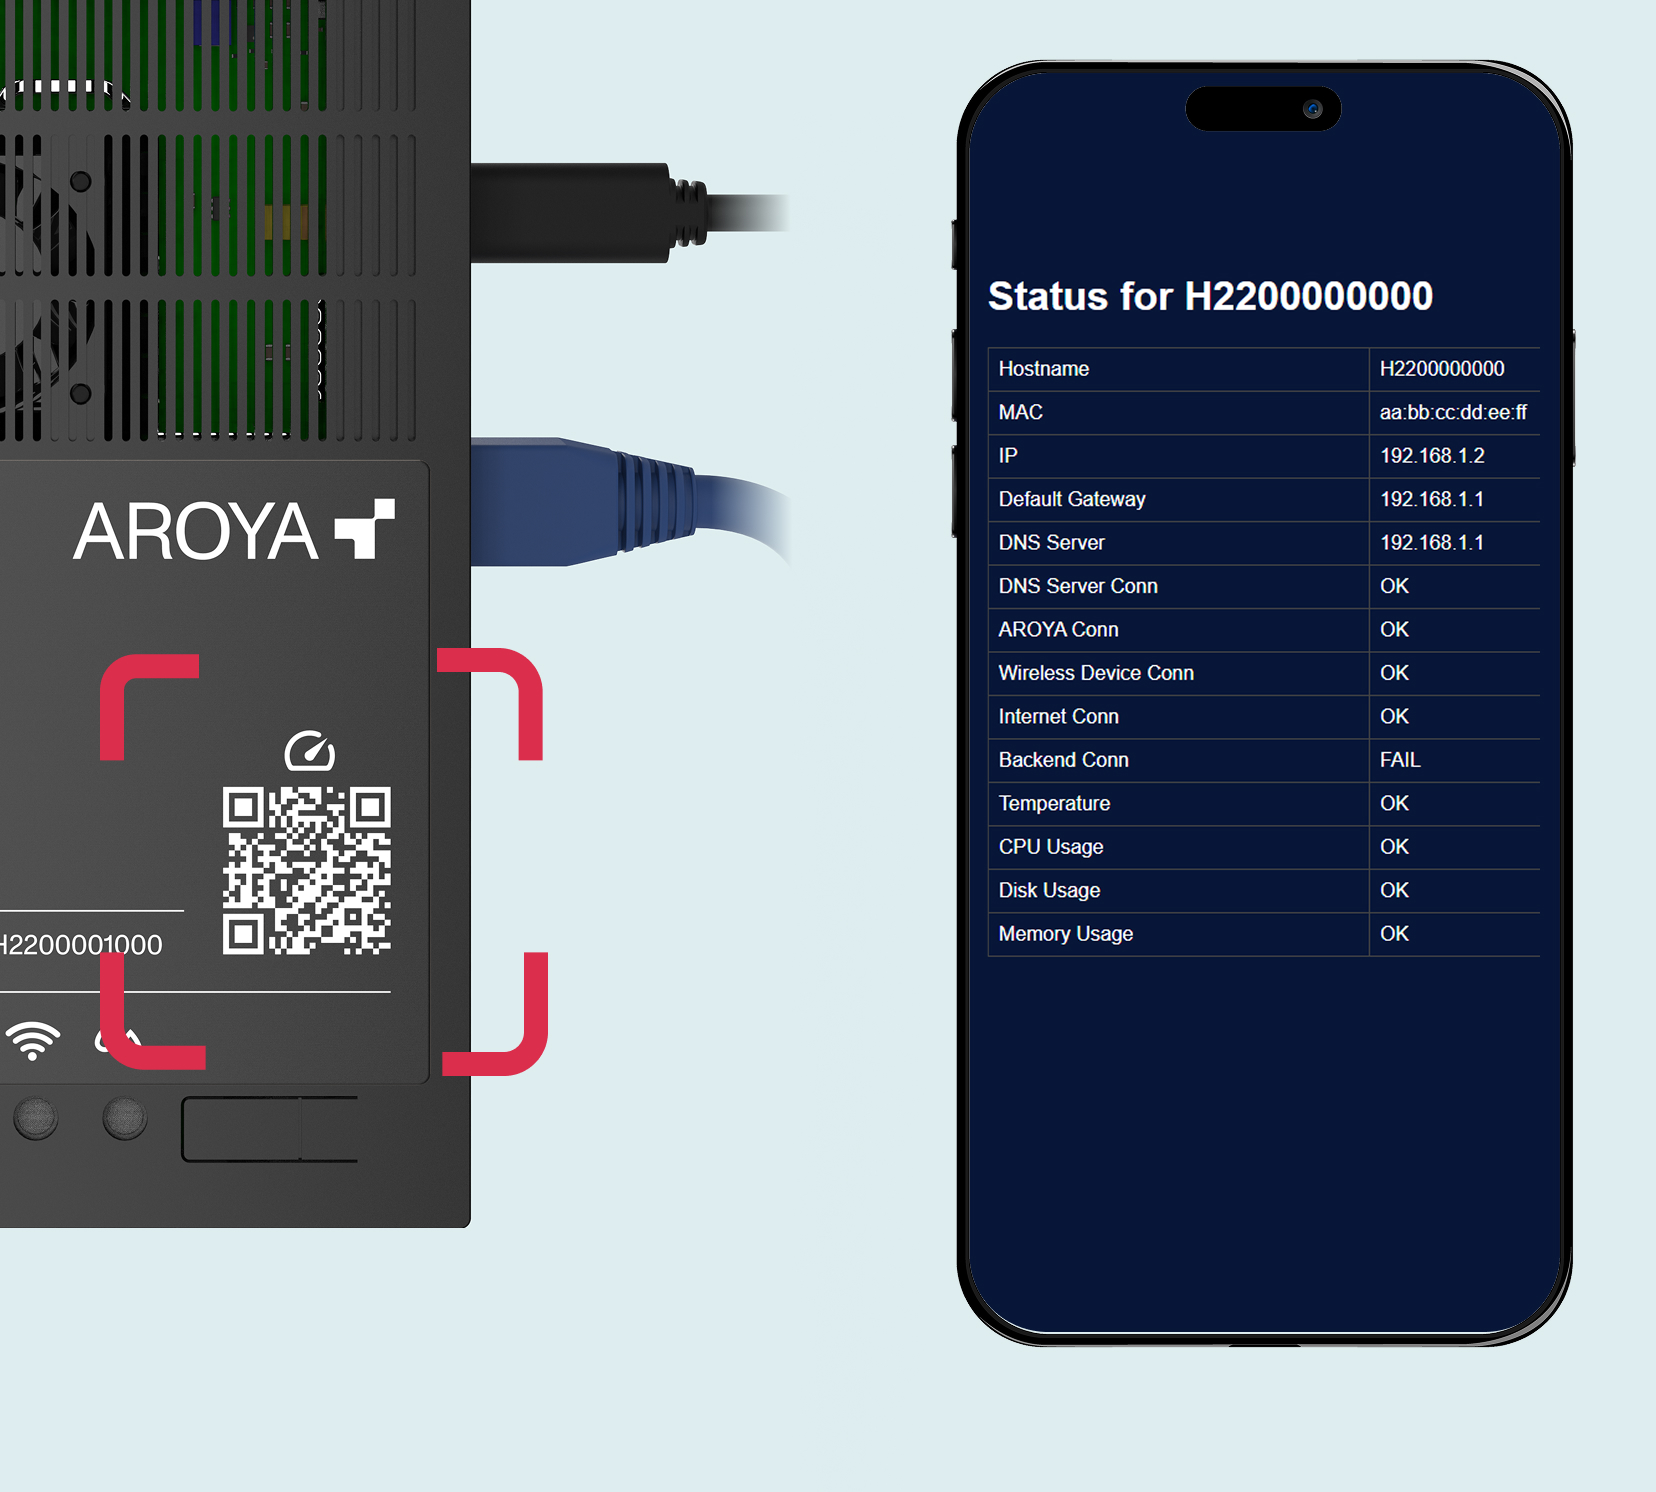
Scan the second QR code on the front of the Gateway with a mobile phone on the same network to access the diagnostic dashboard. This dashboard provides a real-time look at the device status and specific details to help troubleshoot any issues quickly while the Gateway is powered.
Reboot device
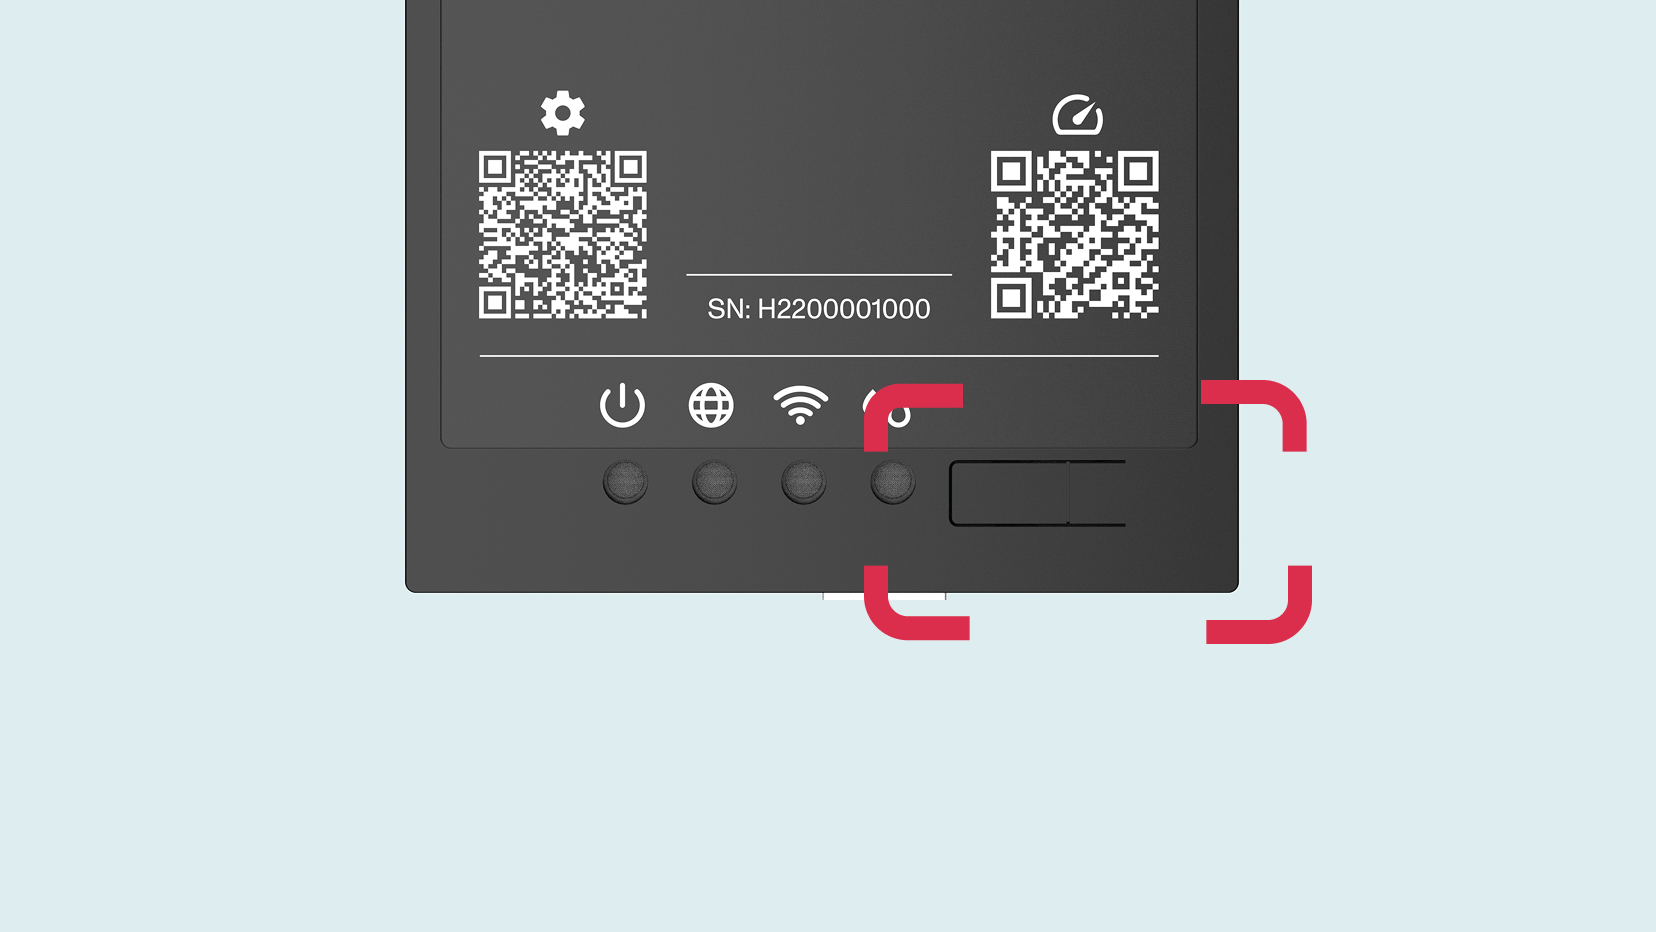
Long press on area on the right from the lights for 5-10 seconds to reboot if you suspect it is malfunctioning or if instructed by AROYA support.